Enjoy 20% off with this coupon: RHINO3DEDUCATION20 apply it when you are paying for this course
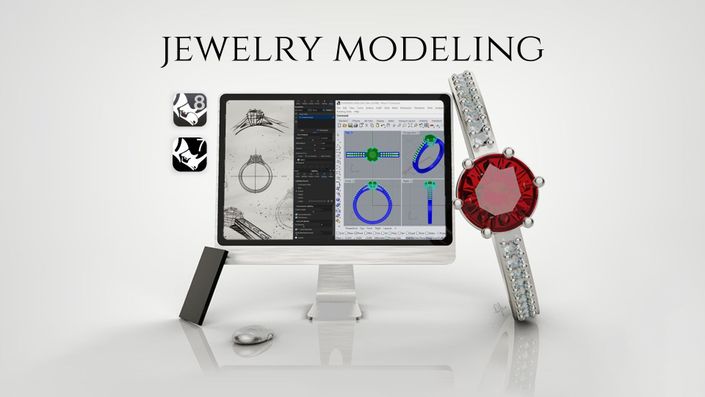
In this course you will practice your knowledge of computational design and apply it to the design of Jewelry and Accessories.
You will begin by reviewing the content of the Computational Design course, you will learn through different projects how to create simple elements such as bands and profiles, to more advanced ones such as baskets, mounts, rings made with 2D cross sections, cutters, and Pavés.
Duration: 15 Hours [Not counting Home-Work time]
This course is available in English
By purchasing the course, you will have unlimited access to the content for 2 years, so don't miss it.
At the end of each chapter, you can go ahead and resolve your concerns with the teacher.
*Our online courses do not qualify for proof of academic status for a Rhino educational license as we are not an accredited school offering a degree program.*

This course is part of a Micro-Minor
If you are new to Rhino 7 or 8 and Grasshopper3D, we do recommend you look at all the courses that are included with the micro-minor for jewelry.
These are the five courses that make up the micro-minor:
Step by step intro to SubD in Rhino 7 and 8
Computational Design with Grasshopper
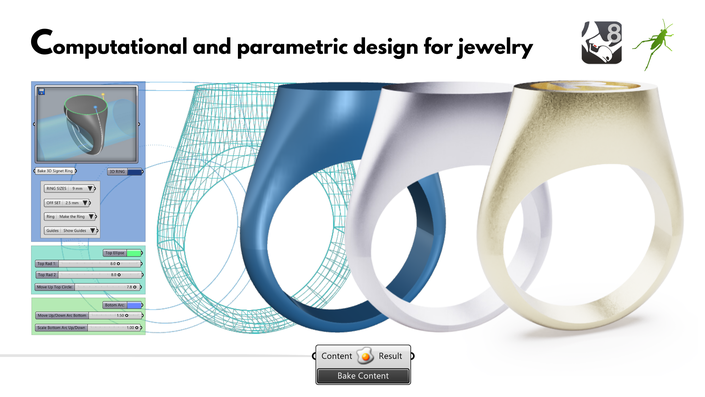
Computational and parametric design for jewelry

Create your own definitions
Explore different parameters and components from Rhino 8 for jewelry creation.

Curve Transformation
Learn to manipulate circles and curves to guide your projects.

Bands and profiles
Create classic bands with different profiles with parametric definitions.

Parametric Cutters
Design cutters for precious gems and fine-tune each element with Grasshopper.

Mountings and Baskets
Explore and create step-by-step bezel and basket mounts as well as supports and cuts.

Gem Orientation
Learn how to orient any object or group of objects and place them in your 3D model.

Rings with channels
Discover how to create rings with channels and serial mounting

Twisted rings
Make your twisted rings or bracelets with this definition.

Create classic silhouettes
From dome rings, signet rings, and more advanced pieces, explore all the possibilities with Grasshopper for Jewelry.

Pavé Application
Discover how to apply and create a Pavé Setting on a flat surface or 3D surface.

Pieces with frames
Create pieces with grids and boxes, creating patterns and shapes.

Signet Ring
Make the DEF for this type of ring

Text On Surface
Create a collection of textual symbols aligned on a surface.

The GH Player
Understand how to best use the Grasshopper Player.

Tips & Tricks
How to make a Toolbar and insert your most used definitions, blocks and materials.
Curriculum
- 3.1 How to start Grasshopper and a few ways to open a definition (1:58)
- 3.2 Grasshopper settings (4:25)
- 3.3 Cables, types, and how to manipulate them (7:13)
- 3.4 The meaning of some colors in Grasshopper (3:39)
- 3.4 ... (a) (Quiz) What does it mean when you see an orange Param or Component?
- 3.5 How to make groups and organize your definitions (2:19)
- 3.5 ... (b) (Quiz) Which keys do you press to find the location of a Param or Component?
- 3.6 All about the canvas (6:52)
- 3.5 ... (a) (Quiz) What is the shortcut to make a group
- 3.7 The Interface -> GH Review and Q&A
- Material you need to know before moving forward
- 4.2 ... (a) (Quiz) One question about the numeric slider
- 4.5 ... (a) (Quiz) What is the answer?
- 5.2 ... (a) (Quiz) Yes!!! time for a question !
- 5.2 ... (b) (Quiz) Look at this list of green limes ?
- 5.2 ... (c) (Quiz) What is the index value of the last item in any list?
- 5.3 ... (a) (Quiz) What is the list of numbers from this series?
- 5.3 ... (b) (Quiz) What list of numbers is the Series component making?
- 6.3.1 ... (a) (Quiz) Curve -> Division: How many points and segments
- 6.3.2 ... (a) (Quiz) About the Domain of a curve
- 6.4.2 ... (a) (Quiz) About the Range component
- Material you need to know before moving forward
- 7.1.3 ... (a) Math -> Operators: (Quiz) What is the result and partial result
- 7.3.2 ... (b) Math -> Domain: (Quiz) About Remap
- 8.1.4 ...(b) (Quiz) How many closed curves does the Dispatch outputs in List A?
- 8.2.1 ...(a) (Quiz) What is the last list of numbers?
- 8.2.2 ...(a) (Quiz) What is the pattern?
- 8.2.2 ...(b) (Quiz) What is the pattern from these Series?
- 9.1.1 ... (a) (Quiz) about the Right Hand Rule
- 9.2.1 ... (a) (Quiz) about the direction of a vector
- 9.2.3 ... (a) (Quiz) about Reversing a vector
- 7.00 What we will learn, see, and create in this chapter
- 7.01 Different ways of analyzing curves (3:44)
- 7.02 Different ways of dividing curves (10:20)
- 7.03 How to extend curves (2:29)
- 7.04 Align construction planes (5:19)
- 7.05 The Evaluate Length Component (2:32)
- 7.06 Project [01]: Orienting circles in order with a guide curve and on top of a surface (6:51)
- 7.07 Project [02]: Arrange several circles, with different diameters, following a guide curve. (15:19)
- 7.08 Do you have questions or concerns about the material in this chapter 7?
- 8.00 What we will learn, see, and create in this chapter
- 8.01 Create a list of ring size values (6:55)
- 8.02 Create very simple 3D band type of ring (3:30)
- 8.03 Project [01]: Create a 3D band ring with fillets, or chamfers (6:18)
- 8.04 Project [02]: A 3D band ring and develop an area of the ring on the floor (10:20)
- 8.05 Project [03]: Ring formed of several bands [plates] and screws (16:11)
- 8.06 Do you have questions or concerns about the material in this chapter 8?
- 9.00 What we will learn, see, and create in this chapter
- 9.01 Adding guides on the stones and modeling a simple cutter in Rhino 8 (2:24)
- 9.02 Create our first simple cutter with GH (8:14)
- 9.03 Project [01] Create a 3D solid cutter on any construction plane! (7:18)
- 9.04 Project [02] Create a 3D solid cutter with different tips (4:09)
- 9.05 Project [03]: Let's polish the last definition of the cutter (9:57)
- 9.06 Do you have questions or concerns about the material in this chapter 9?
- 10.00 What we will learn, see, and create in this chapter
- 10.01 Finding where things are and where we want to orient them to! (6:48)
- 10.02 Project [01]: Orient a group of objects and be able to scale them (8:39)
- 10.03 Project [02] : Being able to BAKE more easily (13:30)
- 10.4 Do you have questions or concerns about the material in this chapter 10?
- 11.00 What we will learn, see, and create in this chapter
- 11.01 Simple basket, but let's fix a few things first! (17:02)
- 11.02 Have the possibility to put cutters and make holes to my basket (12:45)
- 11.03 Project [01]: Polish my basket definition and set the automatic BAKE (11:26)
- 11.04 Project [02]: Create a basket with Subs (16:52)
- 11.05 Project [03]: Creating a simple Bezel (6:47)
- 11.06 Project [04]: An idea to add the claws [Prongs] to the baskets or bezels (19:20)
- 11.07 A new way to join Solids, Meshes, Breps, and SubDs with ShrinkWrap (7:07)
- 11.08 Do you have questions or concerns about the material in this chapter 11?
- 12.00 What we will see and create in this chapter 12
- 12.01 Basic Channel [Channel] (9:06)
- 12.02 Channel [Channel] with option to rotate sections and cover the endings (11:44)
- 12.03 Basic Channel with a closed curve guide and assign a material to the channel (20:00)
- 12.04 Project [01] Apply material to your channels (13:49)
- 12.05 Do you have questions or concerns about the material in this chapter 12?
- 13.00 What we will see and create in this chapter 13
- 13.01 First draw the curves to create a dome ring (26:13)
- 13.02 Continue with the DEF from 13.01 and create the female ring (18:03)
- 13.03 Project [01] Optimize, organize and implement the cache [BAKE] (19:28)
- 13.04 Project [02] Cut the top of the ring (12:41)
- 13.05 Do you have questions or concerns about the material in this chapter 13?
- 14.00 What we will see and create in this chapter 14
- 14.01 Use a circle and an ellipse to create first, the wireframe (8:54)
- 14.02 Time to create the two mapping rectangles, to orient my 2D sections (4:50)
- 14.03 Use Sweep-Two rails and the rectangular mapping component (10:09)
- 14.04 Project [01] Using the Orient component, Sweep by two rails and Scale in XYZ (19:43)
- 14.05 Do you have questions or concerns about the material in this chapter 14?
- 15.00 What we will lean and create in this chapter 15
- 15.01 Part one, we will create the solids that we want to twist (9:16)
- 15.02 Part two, we will twist the solids created in the first part. (6:35)
- 15.03 The last part is to flow the twisted rods, around my rail. (5:06)
- 15.04 Project [01] Create two Sub-Curves, rotate them apart, and join them (17:39)
- 15.05 Project [02] Quickly create a circle and a surface for a ring (5:51)
- 15.06 Do you have questions or concerns about the material in this chapter 15?
- 16.00 What we will see and create in this chapter 16
- 16.01 Create the surface of the Ring we want to use (6:36)
- 16.02 Set the domain of the surface we want to use (4:30)
- 16.03 Create the 3D boxes that we will use to place our 3D tiles (9:53)
- 16.04 Project [01] Polish the previous def and use the wired boxes to place SubD Pipes (8:41)
- 16.05 Project [02] Being able to use Open Curve 2D Cross Sections to generate our surface (17:48)
- 16.06 Project [03] Bracelet with waves (24:45)
- 16.07 Do you have questions or concerns about the material in this chapter 16?
- 17.00 In this chapter we are going to create chain links.
- 17.01 Define the section of the curve that we will use in the chain. (2:09)
- 17.02 Choose the 3D block to generate our chain (13:17)
- 17.03 Project [ 01] Being able to select 2 different blocks, to create my chain (21:47)
- 17.04 Do you have questions or concerns about the material in this chapter 17?
- 18.00 What we will see and create in this chapter 18
- 18.01 Create the first curves needed for our signet ring (5:33)
- 18.02 Create the center curve of our signet ring (6:39)
- 18.03 Create the Blends on the front of the ring and the solid-pipe for the size of the ring finger (12:33)
- 18.04 Create the Blends on the right side and use the NetWork component to create the first surface (13:03)
- 18.05 Union all surfaces and create a Solid then, apply materials and BAKE! (7:28)
- 18.06 Project [01] Polish your GH Def and add the possibility to BAKE! (5:53)
- 18.07 Do you have questions or concerns about the material in this chapter 18?
- 19.00 What we will see and create in this chapter 19
- 19.01 Create a simple 2D Pavé (14:37)
- 19.02 Adding the supports [Prongs] to the 2D Pavé (40:42)
- 19.03 Project [01] Using the Duplicate-Points component in the above definition (6:56)
- 19.04 Bringing a Pavé that is in 2D to a region of a Surface (34:38)
- 19.05 Project [02] Design and create a Scalloped Pavé (29:57)
- 19.06 Project [03] Create a Scalloped Pavé using the Rectangle and a Taper component (19:42)
- 19.07 Let's understand an equidistant triangle to create our Pavé [Equilateral Triangle] (4:46)
- 19.08 Let's use Paneling Tools [Plugin] to create our Pavé in 2D and 3D (38:08)
- 19.09 Project [04] Create a Pavé using Kangaroo2 (16:18)
- 19.10 Do you have questions or concerns about the material in this chapter 19?
- 20.00 What we will see and create in this chapter 20
- 20.01 Create our resources folder for our libraries. Set The [Path] (1:57)
- 20.02 Some Get parameters that we need in order to use the Grasshopper-Player (12:52)
- 20.03 Create a toolbar with some buttons to speed up our work (19:18)
- 20.04 Project [01] Link or join a toolbar with buttons to another toolbar (11:05)
- 20.05 Project [02] Create a GH-Player definition and add a bottom to a toolbar to run the GH-Player definition (9:29)
- 20.06 Project [03] How to orient text on a surface (20:24)
- 20.07 Do you have questions or concerns about the material in this chapter 20?

Course Certificate
Upon completion of the course, you will receive a certificate from our training platform, signed by the instructor.
*Our online courses do not qualify for the proof of academic status for a Rhino educational license as we are not an accredited school offering a degree program.

Meet your instructors
Andrés Gonzalez, Head of McNeel's Division for the Southeast U.S., and Latin America. A software expert since the 1980s, Andrés is a key figure at McNeel, leading global divisions and communities for digital fabrication and design.
Dulce Chavez is an Industrial Designer with a focus on product and jewelry design; she is an instructor for the 3D Jewelry Modeling course in Rhino 7 & 8 and is an ART (Rhino Authorized Trainer), part of the McNeel Miami team.


